Wednesday, September 28, 2011

Comparison Between Social Networking Sites


Hi, Pals today I thought to bring something unique and different to you, so during the thought process an idea came to my mind and hence today I am going to bring forward a comparison between the Social Networking Giants. This is a graphical representation of the daily pageviews for these giants.

This comparison is based on the numbers from the sources like cubestat.com and valuethewebsite.com.

So, just enjoy.


Comparison between Popular Social Networks on the basis of daily Pageviews
Comparison between Popular Social Networks on the basis of daily Pageviews.

Comparison between Less Known Social Networks on the basis of daily Pageviews

Comparison between Less Known Social Networks on the basis of daily Pageviews.

Monday, September 26, 2011

Delete your Gmail


Many times you feel that you no-longer need one of your gmail accounts and then you think that is there any way by which you can delete your gmail account. So, the good news is that google has an option by which you can delete your gmail account. I would go one step further and say that it’s a good practice to delete your gmail account if you feel that it’s of no use to you because it saves precious server space.


So, today I am going to guide you on how to permenantly remove your gmail account.


Step1: Login to your gmail account.


Step2: Go to the link: https://www.google.com/accounts/ManageAccount?service=mail&hl=en
delete your gmail
See the "Edit" link nest to My Products


Step3: Click the Edit link next to the “My Products”
delete your gmail account
See the Remove Gmail Permanently option


Step4:Now select the “remove gmail permenantly” link.
remove your gmail
Final Page for deleting the Gmail Account


Step5: Check the checkbox that says “Yes, I want to permenantly delete XYZ@gmail.com and remove it from my gmail account”


Step6: Make sure you enter an email address to which you have access in the “New email address” field. You need that access to complete deleting your Gmail account.


Step7: Enter your current password and click the “Remove Gmail” button.


Step8: Login to your other gmail account mentioned in step6.


Step9: Open the "Gmail Removal Confirmation" email and follow the deletion link.


Step10: Now after the above link gets opened enter your password and click the verify option.


Step11: Hurray you have successfully deleted your gmail account.


Note: After deleting your gmail it’s difficult to recover any mails and I would suggest you not to run into such situations, if you are sceptical about any mails make a backup first.

Saturday, September 24, 2011

Windows 8 Transformation Pack


Windows has gone through many changes especially in the last decade. Each version of windows has impressed the users especially with its looks. And now these days when everyone is talking about windows 8, I thought that I would bring a beautiful windows 8 transformation pack to my readers. This Windows 8 Transformation pack is developed by DeviantArt.


Features in Windows 8 transformation pack:
  1. Taskbar UserTile
  2. Logon Screen
  3. System Tray icon
  4. Updated Aero Lite
  5. ViGlance updated button skin
  6. Tclock Lite
  7. New windows Aero Theme
  8. Wallpapers
  9. Themes
  10. Aura Beta 2
  11. Watermarks
  • Windows 8 Transformation pack for windows 7:  This transformation pack is for windows 7 and has many beautiful features. That will convert the visuals of windows 7 to windows 8 (Only your O.S. will have looks similar to windows 8).

windows 8 transformation pack for windows 7


Download this transformation Pack HERE.


  • Windows 8 Transformation Pack for windows Vista: This transformation pack is for windows vista and it will give your vista a feel of windows 8.

windows 8 transformation pack

windows 8 transformation pack for vista


Download this transformation Pack HERE.

Thursday, September 22, 2011

How To Share Songs on Facebook


To make your social experiences better facebook supports a feature by which you can share songs on facebook with your friends. Although facebook doesn’t have a built in music player application but still there are certain ways by which you can share music on facebook. So, today I will let you know how to share songs on facebook.


Share Songs on Facebook
How To Share Music on Facebook
Instructions:

  • First of all go to the website that has the music you want to share.
  • For example if you want to share songs from songs.pk then select the song, click the song and let it open in your browser  right-click on the URL in the address bar and select the "Copy" option.
  • Visit your facebook account and go to the update status textfield.
  • Right click and select the paste option. This passes in the link to the music you want to share in your Facebook News Feed.
  • Click on "Share," and the music will be posted on the News Feed for your friends to enjoy.

So, by using above steps you can share songs on facebook.

Tuesday, September 20, 2011

How To Check IP Of A Website via Selfseo


As we all know that all the websites have a static IP address and today I am going to share with you how to check ip of a website via selfseo. This will not only tell you the ip of the website but also its hosting location. This might be helpful if you want to know why your competitor’s site is performing well on some search engine because, some search engines give more preference to the websites that are hosted locally. 
How To Check IP Of A Website via Selfseo
Check IP Of A Website via Selfseo


So here you go:
  • Go to the SelfSeo website. 
  • Enter the URL of a website into the "Enter URL" field.
  • Click the "Get IP" button to find the IP address of the website you entered.

So, by following the above steps you can easily know how to check ip of a website.


!! Happy Surfing !!

Sunday, September 18, 2011

How To Do Chrome Session Restore


Many times it happens that you accidently close your browser. And in most of the browsers there is a provision for restoring your last browsing session but there is no such option in google chrome. So, today I will tell you how to do chrome session restore whenever you accidently close your browser. There is a simple trick involved in the process which I am going to tell you today.

Chrome Session Restore

  • Create a desktop icon for chrome by navigating to its install directory, right click the chrome executable file and select the option that says send it to desktop.
  • Now rename this shortcut to “Chrome - Recovery Mode”
  • Right click on the icon and go to properties.
  • In the properties go to the shortcut tab.
  • Now in the target field, position your cursor at the end of the line and add a space and type “-restore-last-session” without the double quotes. Click ok and you are done.

So, next time you accidently close your browser simply open chrome from that icon and it will do a chrome session restore.

Saturday, September 17, 2011

How addicted to facebook are you ??


Facebook is probably the best social network in today’s date. Facebook ranks  2nd as per Alexa rankings and this is a sign that how these 700 million odd people are addicted to facebook. Today I am here with an infographic that shows how addicted are people to this growing social network. 

So, just set back relaxed and enjoy.

How addicted to facebook are you

Friday, September 16, 2011

How to change mouse cursor on the blog


Blog Owners love to beautify there blogs. They can do anything to beautify there blog and make it stand-out in the crowd. So today I have decided to share with you this tutorial where I am going to guide you on how to change mouse cursor on the blog.
How to change mouse cursor on the blog
Mouse Cursor


Mouse pointer is a very small thing but believe me it can have a very strong effect on your blog. If your blog cursor is nice and attractive then it will hold the visitors for a longer time on your blog and if it is bad and non-user friendly then it will pis$ them off.


So here we go:
  • First of all log in to your blogger account, now go to "Design" and then select the tab that says "Edit HTML" and check the checkbox "Expand Widget Templates".
  • Then, find (CTRL+F) this code in the template:
<body>
  • Now after the <body> tag add the following code:
<style type="text/css">body, a, a:hover {cursor: url(http://safir85.ucoz.com/bdlab-blogspot/dark_blue_3d_cursor.cur), progress;}</style>
  • Save your template and you are done.

If you want to use any other cursors from the list then simply change the line in blue colour with the following:

  • Yellow Cursor - http://cur.cursors-4u.net/cursors/cur-2/cur221.cur
  • Red Cursor - http://cur.cursors-4u.net/cursors/cur-2/cur117.cur
  • Green Cursor - http://cur.cursors-4u.net/cursors/cur-2/cur222.cur
  • Orange Cursor - http://cur.cursors-4u.net/cursors/cur-2/cur220.cur
  • Pink Cursor - http://cur.cursors-4u.net/cursors/cur-2/cur223.cur

Word of Caution: You can find thousands of cursors on internet but only use the ones that are good from the users view point.


So, by following the above steps you can easily change mouse cursor on the blog.

Thursday, September 15, 2011

How to extract audio from youtube videos


Many times it happens that while searching for a particular song you come across its video on youtube. And you have to download the whole video and then by using some desktop tool you have to extract the audio that you need from it. This is a time consuming process and moreover it is also bad for your internet bandwidth. So, toady I am going to share how to extract audio from youtube videos online.

So, use the below steps to extract audio from youtube videos online:
  • Go to the youtube video page and copy its URL.
  • Now go to the site: www.vidtomp3.com
how to extract audio from youtube videos
Screenshot of www.vidtomp3.com

  • Paste the video URL in the textbox, select the quality of the audio you want to download and hit the download button. 
  • Wait for some time until your download is ready.
  • When your download is ready save the file and you are done.

So by using the above steps you can download the audio from youtube videos.

Tuesday, September 13, 2011

How to add Favicon to blogger (blogspot) blogs


Favicon is the small icon displayed in the address bar next to the url. A website having a personalized favicon appears more trustworthy to the users. Moreover having a favicon also allows your blog to stand out from the rest. So, today I will let you know how to add a favicon to blogger (blogspot) blogs.

Lately blogger has come up with various advancements and on of them is the facality to add customized favicons. Earlier in order to add a favicon you need to make the changes in the template code. But now its just a matter of seconds.

So, fasten your seatbelts as we are going to get started:

  • Login to your blogger account.
  • Click on the design tab.
  • Now you will see the “Favicon” widget on  the top right corner.
How to add Favicon to blogger
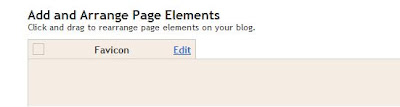
Favicon Widget On The Top Right Corner.

  • Click the edit button.
How to add Favicon to blogspot blogs
Choose The Favicon Dialog
  • Choose the icon which you want to use as favicon, ideally the image should be 16X16 pixels and should be less than 100KB.
  • After uploading the image click the save button and you are done.


Note: Based on the experience of many people it takes some time for the favicon to be displayed.

Bonus: For your sake I have compiled a list of some of the online favicon creating websites.
  • http://www.favicon.co.uk/
  • http://favicon.htmlkit.com/favicon/
  • http://antifavicon.com

Using the above mentioned steps you can easily add Favicon to blogger blogs.

Sunday, September 11, 2011

How to post blank status messages on facebook


Hi guys today I am going to guide you on how to post blank status messages on facebook. You can use these blank status messages when you have nothing to say or you simply want to receive comments from your friends.

how to post blank status messages on facebook
This is what I am referring as a blank status update

So follow the bellow steps:

  • Go to facebook.com and sign in.
  • Now simply hold ALT key on the keyboard and type 0173 while holding the alt key, now release the ALT key and click post update button.
  • So that’s it, now if you also want to post a blank comment repeat the same process for comments.
  • This is how you can post blank status message on facebook.


Note: After doing some research I came to know that there are also some other ways for posting blank status messages. So, if the above mentioned trick has not worked for you can use the below tricks also.

1. Type @[2:space] and instead of space press the space key and click post update button.
2. You can also use alt + 0160 and the click post update button.

Friday, September 9, 2011

Search Preview Firefox Extension


Search Preview is a firefox extension which can make your search experience better by allowing you to see the website snapshot thumbnails while performing search with the Google, Yahoo or Bing search engine. This can be helpful in saving time and bandwidth. Also while surfing by knowing how a website looks allows you can get an idea which sites are trustworthy (I mean the sites which don’t have any bad stuff associated with them).

Search Preview firefox extension
Screenshot of Search Preview Extention

Along with the thumbnails the extension also shows you the popularity rank of the websites. The best part of this extension is that it has an option “Request Update of this image” and this gives you the latest snapshot of the website.

If you want to download Search preview firefox extension you can do it here.

Tuesday, September 6, 2011

Check Website Loading Speed By Pingdom Tools


As we all know that website loading speed is an important factor that forms a significant part of on page seo. The websites having less loading time can have an edge on the website which has medium or high loading time. So, today I will guide you on how to check website loading speed by pingdom tools. Pingdom is a service that provides free tools for checking the website loading speed.


So here we go:


pingdom tools screenshot

  • Enter your website name and click test now button.
  • It will show you a detailed file-wise analysis and at the end of the page it generates a summarized report.
check website loading speed by pingdom tools

  • Now ideally your website loading time should be between 1 to 2 seconds.


If your loading time is more than 2 seconds then you should use the below steps to reduce it.


  • If you feel that your theme is quiet heavy then you can consider changing your theme.
  • Don’t use heavy images i.e. images should be below 100kb.
  • Reduce the number of redirects if any.
  • You can also take the advantage of gzip, gzip is a compression algorithm.
  • Use static images instead of animations.
So you can use pingdom tool to evaluate and improve the load time of your site.

Sunday, September 4, 2011

How To Delete Your Technorati Account


Most of you would have heard of Technorati, Technorati indexes more than 100 million blogs and hence many new bloggers use it as a tool where they can keep a track of how there blog is progressing. 

But coming on the point for some reasons Technorati has not incorporated delete functionality in Technorati accounts. This is the reason why many people who want to delete there accounts become frustrated and leave Technorati. 
How To Delete Your Technorati Account
Delete your Technorati Account

Today I am going to guide you on how to delete Technorati account. First of all let me tell you that there is no automatic option for deleting the account but you can delete your Technorati accounts manually by submitting a ticket to their support team.

So here we go:

  • First of all go to this Link.
  • Now in the “Reply to this topic” text area. Enter your Request and User Id, email address along with your blogs name. 
  • Submit your Request.
  • Now comes the most difficult part and that is waiting coz Technorati support is quiet unresponsive and it can take around a month for your account to be deleted. 

Hoping that someday Technorati improves its support.